


Introduction
This post is part of a series of posts discussing my experiences with putting in place Dev Ops processes around the Power Platform.
If you have not read the introduction post, I would suggest starting there.
If you have read it then, that is great and thanks for taking time out of your busy schedule to read this.
As mentioned, there are two core pipelines, the build pipeline, and the release pipeline. This blog post will delve into how they work currently. I fully expect that they will change as I get feedback from the community.
I really look forward to that as I am sure they can be better! I have some ideas on some tweaks that need to be made.
Anyway, let’s get started.
The Build Pipeline
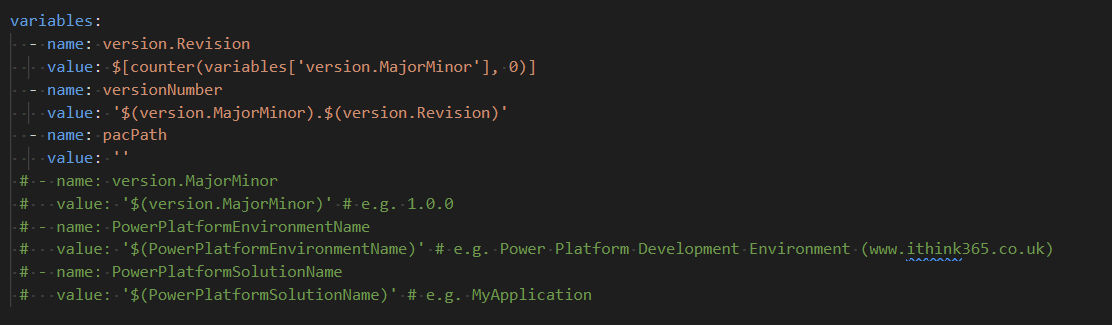
So, the Build Pipeline has a parameter block and a set of variables.
The parameter is used to decide whether the build should create a managed or unmanaged solution.

The variables are used to identify the solution (PowerPlatformSolutionName) that needs to be exported and the name of the environment (PowerPlatformEnvironmentName) that the solution needs to be exported from.
The final variable provides the major, minor, and revision numbers as the version prefix for the solution version. The build number is handled by a counter managed by Azure Dev Ops.
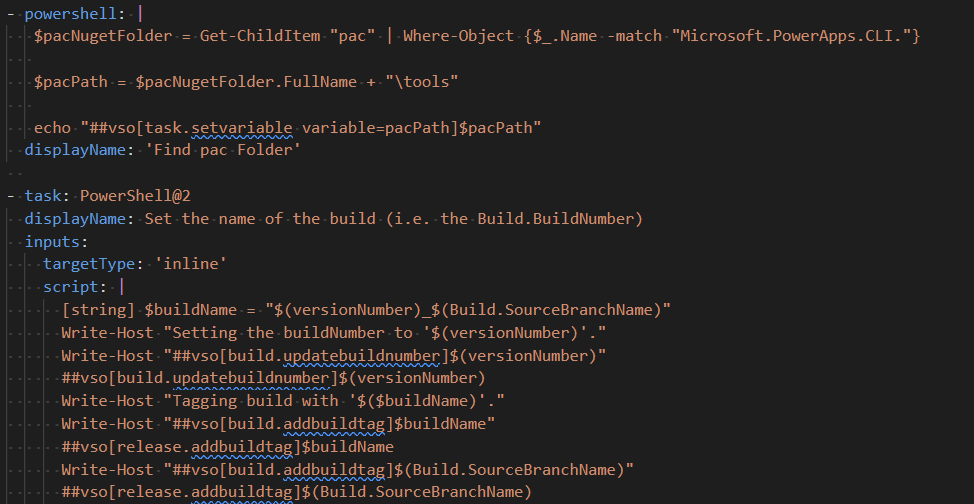
The first set of tasks install the Power Platform Build tools including the Power Apps CLI that are required to work with the Power Platform solutions.

Next, we resolve where the PAC tools are installed on the build agent and set the version number.
We then publish the customisations in the environment. This makes sure that we are using the latest version and if a developer has forgotten to publish something it will get picked up.

Then we set the solution version based on the build version. I like this as you can now tie the build / release process to the solution deployed to Power Platform!

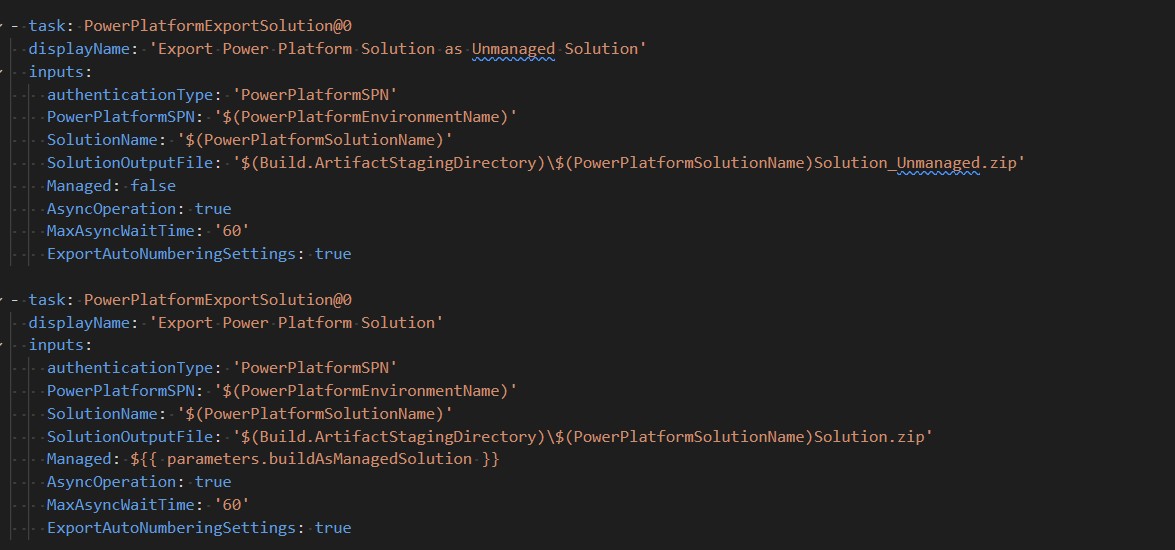
Next, is exporting the solution. We do this twice! Once as an unmanaged solution and again as a managed solution. This means we have a copy of the solution held in source control in case something happens to the source Power Platform environment.
The next step extracts the solution settings, environment variables and connection references.
Next, we unpack the solution so that we can get the environment variables and blank them. This makes the solutions easier to port into the other environments. Also, if we want to apply settings as part of the release, we can do that!
Once we have extracted the environment variables and cleared them out, then we can pack the solution back up.

Finally, we take a copy of that solution settings file and use the Azure Dev Ops Publish Assets task. This associates all the files in the Artifacts Stage directory to this build.

These can be seen here.

Phew, let’s talk about the release pipeline!
Release Pipeline
The release Pipeline has been covered in a previous post a little but let’s discuss how it works.
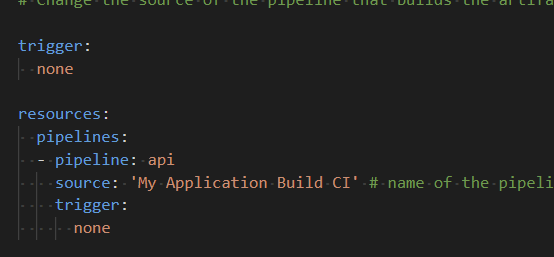
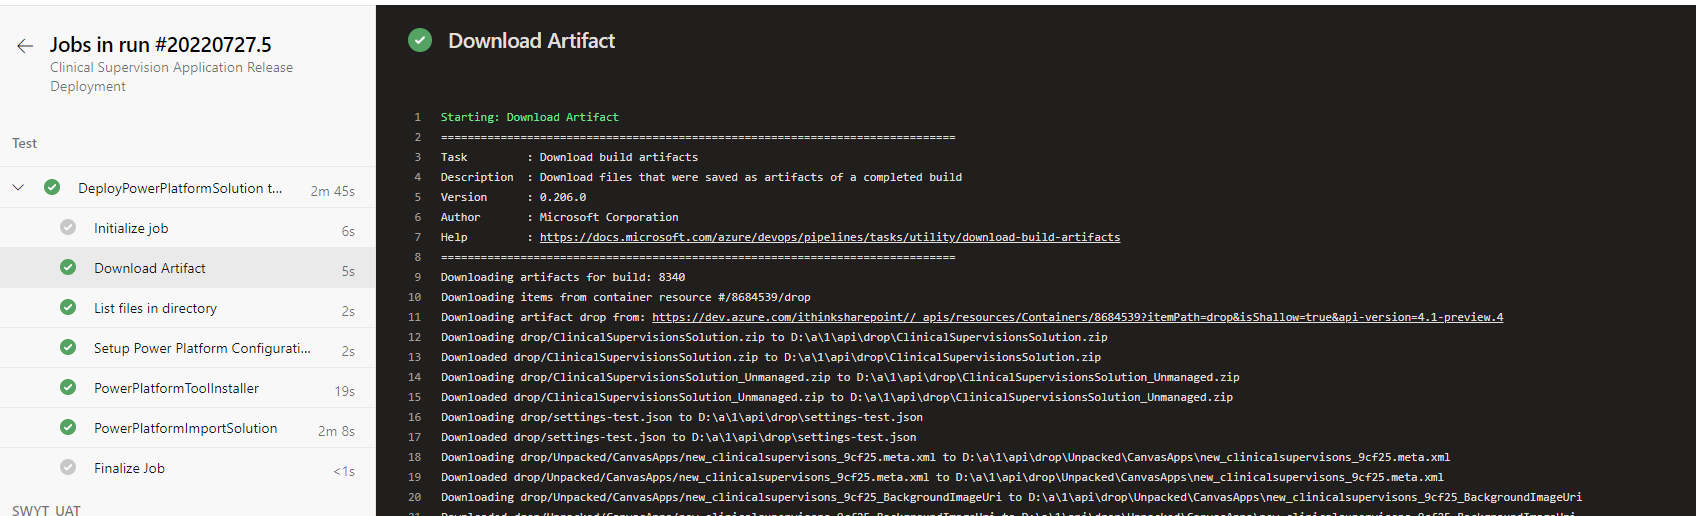
These release or deployment pipelines need to deploy something. That something is referred to by the resources tag. In our example we are referring to the build Pipeline assets.
When you run the release Pipeline you can see here that the files are downloaded by the Download Artifacts task.
The release process will deploy to the various stages defined by this YAML script.
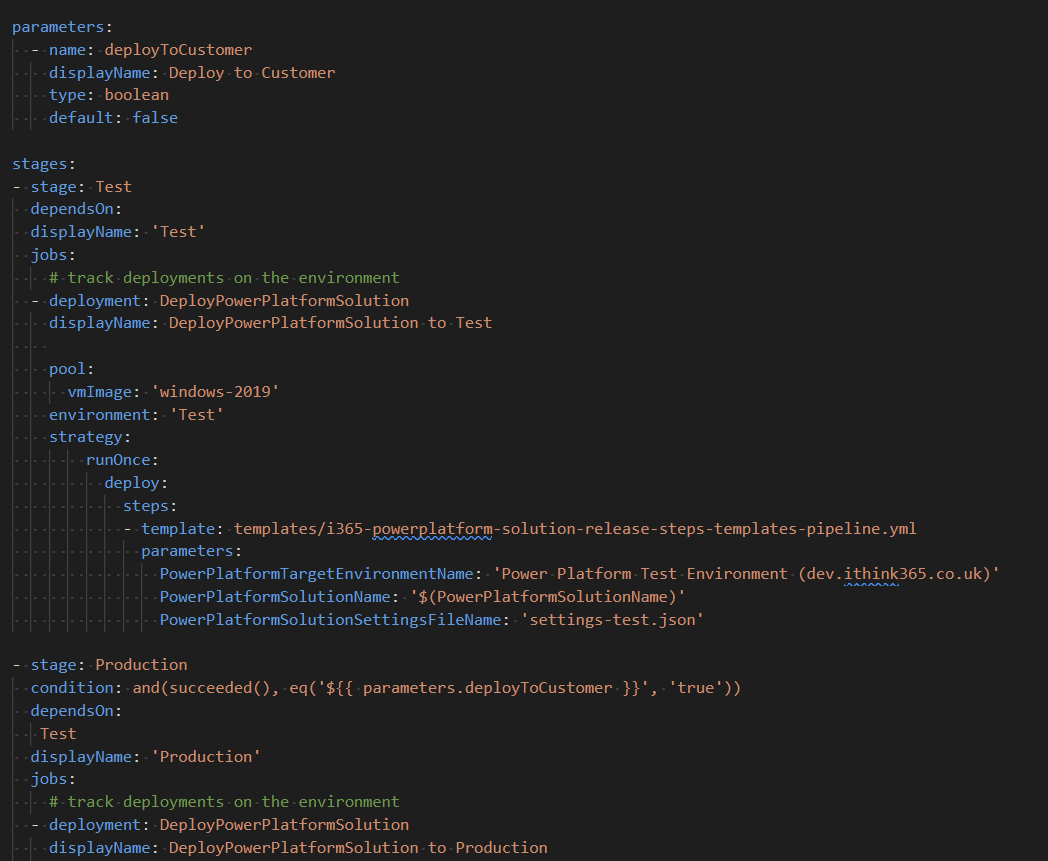
However, the main logic to deploy is held in another YAML file, as shown by the template parameter.
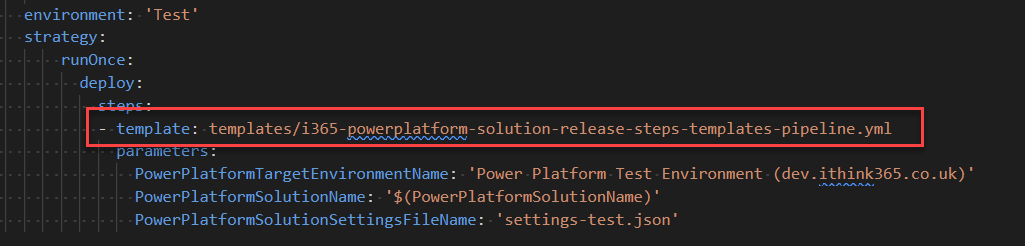
Let’s look at that YAML file!
This starts with a set of parameters that are used to deploy the solution.

The release is quite simple and to be honest there are some more things that we can do. For example, apply settings to the solution. However, I wanted to keep this part simple.
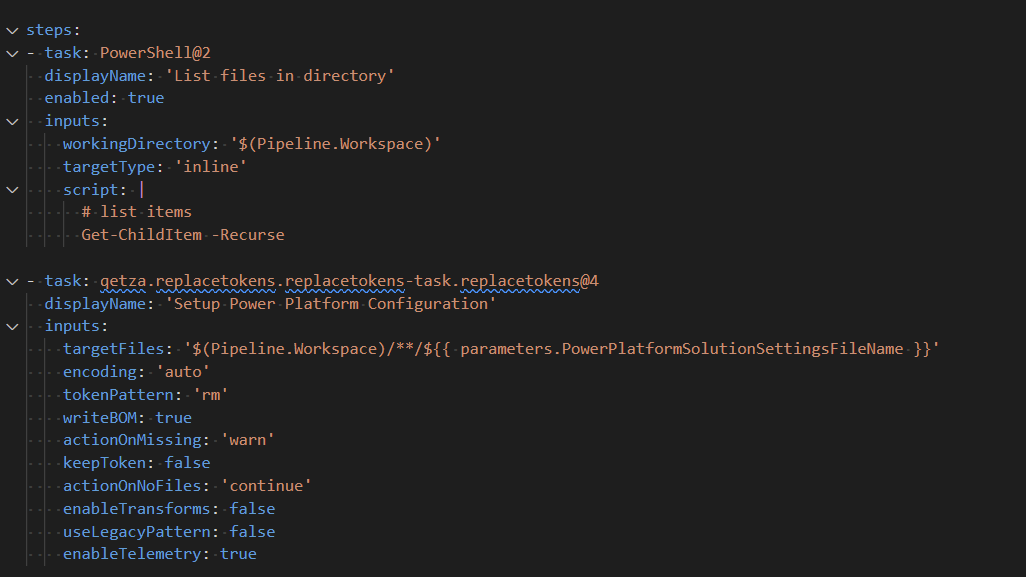
So, initial steps show the files that are part of the release (for debugging purposes).
Then we have a task which could be used to replace tokens. This might be used for example to set values in the settings file. (More on that in another post).
Next then we install the tooling using required for the Power Platform deployment.

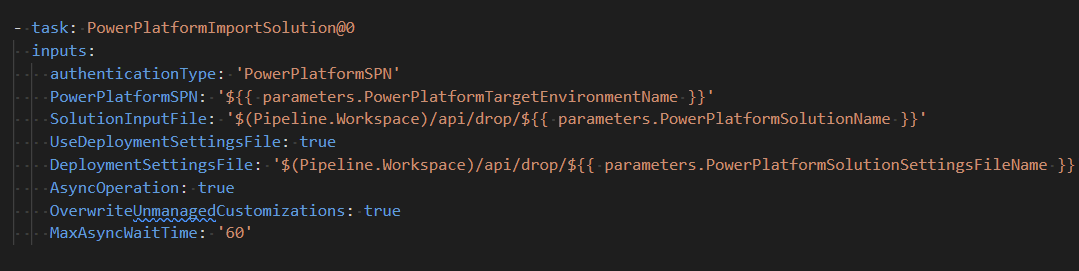
The final task performs the actual deployment into the Power Platform solution into the environment using the PowerPlatform import solution task. This also applies the settings via the DeploymentSettingsFile parameter.
And to be honest that is it!
Conclusion
So, in this post we have covered how the pipelines work. I hope that it has been useful. I am sure you will have some improvements to suggest. Also, I bet there are some other ideas for what could do done here. If you do, I would love to hear them!
In the next post I will discuss some common issues that we have seen when deploying the solutions with these processes.

[…] How the Power Platform Build and Release pipelines work […]
[…] How the Power Platform Build and Release pipelines work […]
[…] get started, read the article on the Power Platform Build and Deployment Pipelines that I built a few years ago. These have been extended to enable support for configuring Copilot Studio Knowledge Support […]