Introduction
At iThink 365, we have been building AI Agents using both Microsoft Copilot Studio and Azure AI Foundry. The Microsoft Copilot Studio product is constantly evolving and improving. When chatting with people, I often find that people are not aware of some really useful features that help you to build better and more intuitive agents.
In this post, I wanted to share a couple of tips on how you can improve the conversation flow of Agents built in Microsoft Copilot Studio, making them more intuitive and easier for you and your customers to use.
Input Variables
Copilot Studio is able to have input variables which are scoped at the topic level. This incredible feature allows you to make use of your Copilot Studio LLM to discover and fill the input variables based on how you tell the LLM to identify the information that should populate the variable.
This capability is really powerful and can help take a lot of the heavy lifting of detection, transformation and capturing of information for each topic.
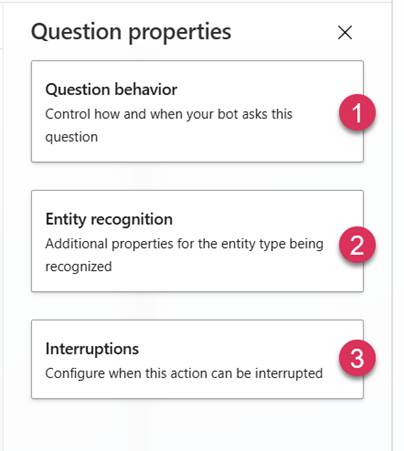
These input variables are configured for a topic using the Details tab. Within the details tab you have three tabs: Topic details, Input and Output. Use the Input tab to configure the inputs to the topic.

These variables allow you to capture key parameters and information that you need for the topic to function properly.
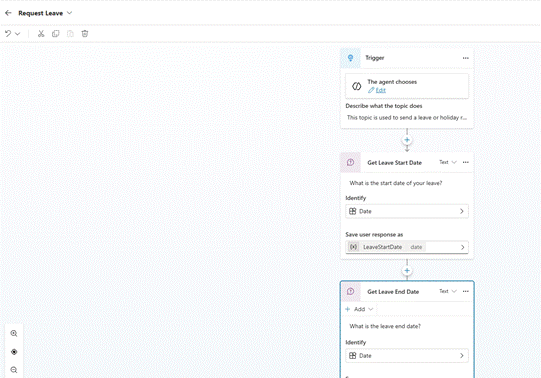
Let’s go through an example. In this example, we are processing a user’s leave request. This is achieved by creating the leave or holiday request topic. With this topic, you might have a start date and end date of the leave request. You also have a comment or reason for the leave request. By creating an input variable for each input, such as:
- Leave start date
- Leave end date
- Holiday comments
The topic will then have each variable automatically populated based on the input from the user. Let’s take the input from the user.
“I would like to go on holiday with my family from the 1st August to 14th August.”
If we configure the topic input variables correctly, then this user prompt will equate to the following:
- Leave start date => 1st August 2025
- Leave end date => 14th Augst 2025
- Holiday comments => Taking a holiday with family.
These input variables are powerful, and they help simplify the topics. Rather than having a topic with a set of questions that ask for more information from the user. They use the LLM and its knowledge to fill out the input variables or fill the slots. This means that the conversation with the agent is much more natural, and a request can be put together in natural language as a sentence rather than a series of one-word prompts for each part of the request.
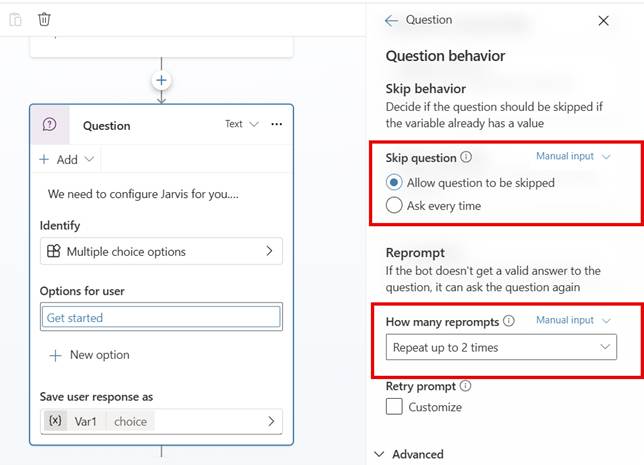
The image below shows an example if you were not using the input variables. You can see all the questions that the user would be asked for each of the dates for the leave request, this is not going to give a smooth or conversational fill to the agent.
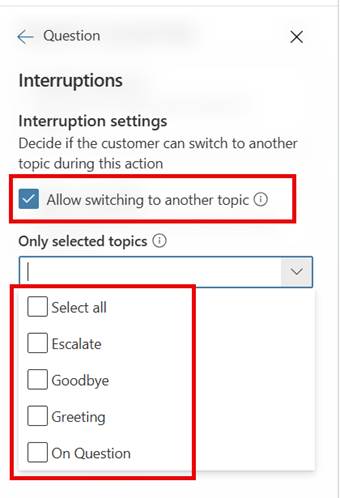
The input variables can be configured so that you can give feedback if a variable cannot be filled. An example is shown below.

Using this approach helps you guide your user with what information to provide to get the topic to work correctly.
Now that we have talked about input variables, lets talk about how we can use output variables to improve the responses that Copilot Agents provide to the users.
Output Variables
When we first started building agents in Copilot Studio, one of the challenges we had was
“How do you help the Agent to respond with the right information?”
You can use activities such as the message activity to output responses back to the user.
Well, fortunately Copilot Studio has “Output” variables which can be used to capture the key information that the topic should include. This will be used by the Agent and LLM to make a suitable response to the user as a conversation.
How do we use and configure the output variable?
The output variables are configured at the same place as the input variables by clicking on the details tab and choosing Output. Here, you can create multiple variables for the topic output and describe to the Copilot Studio Agent what is contained in the variable. This will help the Agent to come up with a suitable response for the user following the topic completion.
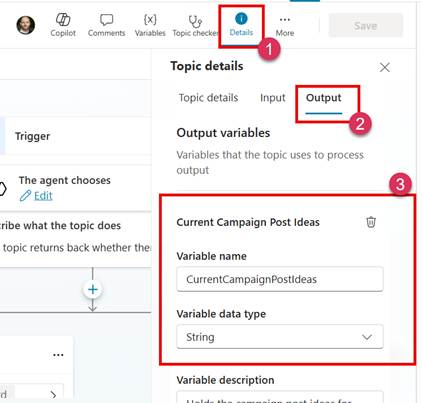
The creation of the output variable allows it to be set during the processing of the topic. For example, in our example, we might then fill the output variable with details of the leave request with the start date, end date, leave request comment, manager details and that it has been submitted for approval.
Using the Output variables gives a great way to control the information that should be given to the LLM so that it can use it to respond back to the user.
What is one of the key features when using Output variables is that you are not showing the raw data back to the user which could confuse the user as to what is important or not.
To help, lets take the following example, an agent that helps us creating a marketing campaign. This agent allows us to create a campaign over two weeks which builds up a story. The agent uses AI to generate the idea and we can ask it for the post ideas. Here, the agent returns a chunk of data. Now I used to output this via a message activity so that the agent had some content to respond back to the user in a more natural way. However, this means that you see a load of data coming back that is not nicely formatted and, as mentioned above, is confusing to the end user.
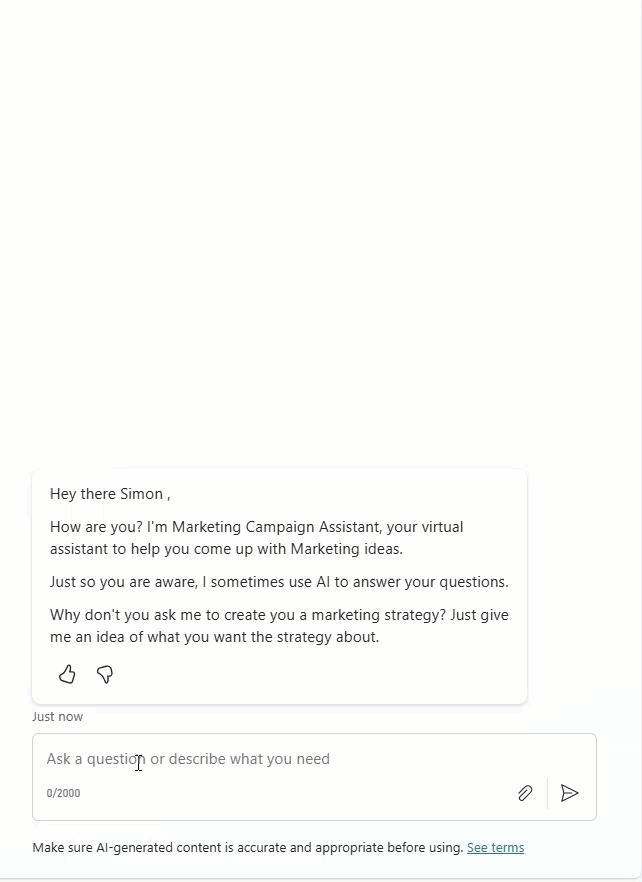
However, using the Output variables to capture that information, the output from the agent now looks like this.
There is no rubbish being output to the user instead, in the second example, we only see the result that the Agent displays, and this has been nicely formatted by the Agent’s LLM.
This is a much better experience for the user and leads to a conversational type flow from the agent to the flow, which feels nicer and more natural to interact with.
Conclusion
In this article, we explained how we can make use of key Copilot Studio Topic features, which allow us to use the power of Generative AI and LLMs to do the heavy lifting and detection of inputs. This helps us improve how our agents function, making them feel more natural and enhancing the conversational style of the agent when processing user requests and responding to them.